08 February 2013

Challenge #3 - Kitchen Cabinets Part 2

As promised, here's the upper cabinets in the kitchen!
Before 
After
This first cabinet is above the plates/bowls/cups, and to the left of the sink. This is where I keep my casserole type dishes, my measuring cups, and where I moved the salad spinner. In the before picture you can see the extra white baskets that I moved to the utensil drawer, and several measuring cups I dejunked. I was doing pretty well with measuring cups, but I started to notice that a 4-cup measuring cup would come in really handy since I was starting to make larger and larger batches of everything. My husband got me a great 4-cup measuring cup for Christmas, as well as a 2-cup. So... I didn't need the old 2-cup, and I realized I really didn't need the 1-cup either, or the smaller set of measuring cups. I already use smaller measuring cups as the scoops in my flour & sugars, so if I really desperately needed a 1/4 cup ONLY for something, I could pull it out of that.

These are also all of my casserole dishes. I have one 9x13, one smaller oval that I think is about 7x9, and inside the oval one are two shallow serving dishes that nest in each other. On the top shelf I also have another 9x7 pyrex, and two 6x7 pyrexes, nested together, and two round pyrex bowls, one smaller without a lid.

We also have the remaining baby food in this cabinet. For a while we had a lot of baby food here, which is why our salad spinner was stored below... but our toddler is eating more table-food now, and we're not buying the baby food anymore.

Before 
After
To the right of the sink is our "catch-all" cabinet. It was kind of being overrun by random things we didn't know what else to do with. But now it's a bit better. The top shelf holds extra dry-goods that don't fit in the cabinet I'll show next. The middle shelf has our supplements, as well as straws and plastic utensils. I wanted to fit the straws & utensils on the bottom shelf, but they were too tall. the bottom shelf has ziploc bags in three sizes, as well as napkins, paper lunch sacks and coffee filters, which we often use for holding goldfish or other finger foods for snack time. (We don't drink coffee... so we don't use them for their intended purpose anyway.)
Before 
After
On the other side of the kitchen, to the left of the microwave is our dry-goods cabinet. This was also starting to get stuffed with random extras, including some raw nuts that were starting to go rancid (oops!). We straightened this cabinet, and even changed what some of the bins were holding and made room in a large one for some homemade pancake mix, which my 7 year old helped me mix.
Before
After
Above the microwave is another cabinet, that is too high for me to reach without a step. I laughed when I opened the cabinet for the before picture, because almost everything was missing from it. This cabinet normally holds the only two vases I own (one large plastic, and one small glass bud vase), a round bowl meant for centerpieces, and three pitchers. Even in the after picture, one of the pitchers was being used, so it wasn't put away.
Before 
After
And to the right of the microwave is the spice cabinet. As I was cleaning out the "catch-all" cabinet, I found 12 small empty spice jars that I had purchased a while ago from the bulk foods section of our grocery store... planning to transfer spices from much larger containers to save space... but then I never got around to actually doing it... until this project! I was able to downsize several spices that didn't even fill the new smaller jars, and a couple huge spice containers were able to be moved to the garage pantry shelves after filling a smaller jar. There is so much more room in this cabinet now, and the spice carousel actually spins freely without things falling off the back. :) I also had so much room that I was able to put the spices only on the outside of each level, and put other things in the middle. The top level only has extra toothpicks in the middle (we ended up with several extra small boxes of toothpicks after my husband helped with a cub scout activity), and the bottom shelf has cupcake wrappers and sprinkles in the middle.

I did keep a couple of the larger containers on the lower shelf for a couple reasons: We use things like the taco seasoning WAY too frequently to be refilling the tiny containers, and I ran out of smaller jars. :)

My recipe book is on the top shelf, along with one cookbook. I have a few more cookbooks in the garage, but I rarely reference them, and with limited space, they just didn't make the cut to the kitchen cabinets. :) The black recipe binder has most of the recipes that I use frequently, and we do a lot of normal dinner cooking without recipes at all... just winging it. If we do need a recipe for something, it is more likely that I will find something online, and won't even think to check the books I already have.
Before 
After
Finally, the cabinet above the fridge. I ended up donating the magnetic letters which I haven't been willing to use for the past 3+ years, as well as a Christmas tin that I'm not sure why I held onto in the first place. The round pyrex bowl with lid was moved to the first cabinet I showed above. The rest includes a box with a set of designer stem glasses that were a wedding present from my parents (his & hers Mickey & Minnie glasses that we use for very special occasions), and a set of 5 glasses (used to be 6) that were also a wedding present and have a frog icon stamped into the glass, and three mugs that I use for hot chocolate. I rearranged these so that I could also fit a bag of corn chips in the cabinet. We usually just toss the bag on top of the fridge, but the kids like to climb up there and make a mess with the chips when they know they're there... out of sight, out of mind, right?

Also, on top of the fridge you can see the broken panel from the utensil drawer, that I still need to fix.

And that concludes the kitchen! I still need to organize & straighten the pantry shelves in the garage a bit more, and that is an ever evolving process as we continue to add more to our food storage, and try to move things out of the kitchen.

For those that were wondering, my crockpot doesn't fit in any of the kitchen cabinets, and I don't use it nearly as often as I should... so it is usually stored on a shelf in the garage.

06 February 2013

Challenge #3 - Kitchen Cabinets Part 1

Okay, so this challenge took me a bit longer than I intended, and a bit longer to write up than I anticipated... so I'm a bit late... but you forgive me, right?

Thanks. :)

To start... I have a small kitchen. I've had smaller, but usually with more cupboard space... at least this time I have a garage.

I've shown pictures of the kitchen before, but here's a refresher:
The sink side of the kitchen and the dining area.
The stove & fridge side of the kitchen. There is a cabinet above the microwave, and above the fridge.
In the spirit of full disclosure... my kitchen does not look this good right now. I haven't finished moving some of the decluttered items to the garage yet, and the counters are currently more cluttered than the cabinets... it happens. But this is approximately what it will look like again when I finish. Except that the crock-pot does not belong on the counter at all... but it is still there for now.

I think we'll start with the lower cabinets on this post. That includes most of the cookware and dishes. This first cabinet is the lower one closest to the kitchen table. This is where we store all our plates, bowls, cups and leftover containers, and most of our mixing bowls. Basically... it's the plastic cupboard. Everything is plastic because we have 6 very small children, and we store these low so the kids can help set the table and unload the dishwasher easier.
Before 
After
This cabinet didn't need too much work. I decided to donate the wooden lazy susan. We haven't used it in over two years, because it doesn't fit on our table, and now our kids have learned to help each other pass things around the table, so we don't need it as much. The salad spinner moved to a different cabinet. We still have the leftover containers on the top shelf (and several of them were being used when I took this pic), and the back corner still has four mixing bowls that nest pretty well, as well as our red plastic colander that we use for pasta & such.

Above the plates & cups is the utensil drawer. We've had problems with this drawer breaking ever since we moved in... so I need to fix it. When I took the before picture, we had just pulled everything out of the drawer and set it on the counter.
Before 
After
We decided to get rid of our old silverware and only keep one set. We had talked about doing this for a while, and just never got around to it. I just discovered last week that our local women's shelter was asking for silverware donations, so now seemed like the perfect time. The newly dejunked drawer now holds a basket of corn on the cob skewers, a basket of chip clips, the utensil caddy which holds 8 large spoons, 16 small spoons (that's what came with the set!), 8 large forks, 8 small forks, and 8 serrated knifes that don't belong with the set, but that we use for steaks & things. The other baskets hold my measuring spoons, the 8 dinner knives that came with the silverware set, two serving spoons (one slotted) and the ice cream scoop, my cheese knife and the vegetable peeler.

The next cabinet over is the large one under the sink. I totally forgot to take an after picture of this one, but here's the before. I didn't do much in here, and didn't get rid of anything... just straightened it. Here's where we keep extra garbage bags, dish soap, dishwasher detergent, foil, saran wrap, wax paper, freezer paper, and my cooktop cleaner.

Next to the under-sink cabinet is the dishwasher, then one more narrow cabinet between the dishwasher and the wall.
Before
After
This cabinet actually made me laugh. I took the before picture, then I pulled everything out to figure out what to dejunk, and realized I really had already cut back to my minimums... so the after picture looks nearly identical. I decided to pull everything out again and lay it out so you could more easily see what I have kept.
I have: one light baking sheet, two dark baking sheets (identical and stacked together), one mini-muffin pan, one ancient cupcake pan, one wire cooling rack, three cutting boards, and across the top, two pie tins and three loaf pans. You can probably tell from this how much I actually bake. :) The only other thing in the cabinet is the wire rack for my round baking stone, which for some reason doesn't fit in this cabinet.

Above this cabinet is a small drawer.
For some reason, I forgot to take an after picture of this drawer too. Here's where we keep all the baby bibs, and the extra sponges & kitchen rags.

That concludes the sink side of the lower cabinets.

On the stove/fridge side the first cabinet between the wall and the stove has a drawer above it too.
Here's the before picture... pretty sad. This drawer is supposed to hold the hot pads and the kitchen towels. Unfortunately, the kitchen towels are in the clean laundry pile that I am procrastinating getting to... so the drawer is currently empty. There was no point in taking an after picture. :)
Before 
Midway through.
This cabinet below the towel drawer took a bit longer, because it also ended up including extra things from elsewhere in the kitchen. Midway through you can see the round baking stone on the far left, the air-popper and popping corn at the back, and the blender in front.
This is a pile of stuff that I dejunked just from this one cabinet. The food chopper we just didn't use. The popcorn buckets we didn't end up liking (they held too much popcorn, spilled too easy, and were not easy for little hands to get popcorn out of). The KitchenAid attachment didn't come in as handy as I'd hoped. The tiny waffle iron has been replaced with a bigger, and more functional one, and the black plastic cover thing is for a cheese grater that we already got rid of because it broke.
Before 
After
Up next is the drawer to the right of the stove. This is our spatula drawer. I mentioned this drawer in a previous post, showing that it doesn't have to be perfectly organized. Unfortunately, the drawer was starting to break the 80% rule, and it was time to be purged. Most of the gadgets in this drawer are still used, but not on a regular basis. Anything that wouldn't be used at least once a month I moved to a plastic bin.
Then the plastic bin was put on the shelf of the previous cabinet.
After
The other things I put back into this cabinet are my rolling pin, and my KitchenAid mixer (the bowl for it was in the dishwasher at the time).
Before
After
Two more drawers to go! Under the spatula drawer we have two deeper drawers that I use to store my pots & sauce-pans. I decided to move the aprons out of this drawer, because they were just making things difficult. I had two spoon-rests on the bottom of the drawer and I asked my husband if we really needed them, since we hadn't used them in a while. He told me he had been looking for one because he wanted to use one, but hadn't known where it was... HA. My bad. So, we chose one spoon-rest, and donated the other. Now the drawer is uncluttered enough that he can find the spoon-rest. I also have a wok and a large pot, each with a lid, and a strainer.
This last drawer didn't need any decluttering or reorganizing. It has looked pretty much the same since we moved in a year and a half ago. I have two sauce pans, one deep, the other shallow. The shallow one also has the steamer in it, and a lid, the deep one has a lid along with a tinier sauce pan, with it's own lid. These pans only fit in this drawer in one way, and it's the only place in the kitchen I have to store them, so we just make sure they get put away where they belong every time.
I almost forgot the last space in the lower half of the kitchen. This is the drawer under the stove. It also didn't really have a before & after because I didn't have anything to get rid of from here. I have three frying pans, a red silicon vented pan cover (because my medium sized frying pan doesn't have a lid that fits it), and my waffle iron/griddle/sandwich maker.

Tomorrow I'll cover the upper cabinets!

04 February 2013

Get Real

Childhood Dreams
When I was a child, I often dreamed about what my life would be like when I grew up. Sometime during the later grade-school years, I created my “life plan.” This plan detailed how many children I would have, what their names would be, when they were going to be born, where we would live, how much money we would have, etc. I planned to have twelve children, and name them all after characters in my favorite books, which at the time included The Boxcar Children.
We were going to live on a farm where we could own a few horses, breed and raise Rottweilers, and go star-gazing every night. I had detailed floor plans of our house and barns and even had a list of furniture I was going to purchase to fill my children’s rooms (including cool plastic toddler beds, bookcases, toy-boxes, and child-size tables & chairs).

Then I grew up.

I am currently expecting our seventh child, so I’m more than halfway to twelve… but almost nothing else from that plan has happened or will ever happen. I got married earlier than I had anticipated (20 instead of 23), I obviously had no choice in the gender of my children, and none of them are named after fictional characters from children’s literature. (One of the twins has Henry as a middle name, but he is named after a great-grandparent, not after Henry in The Boxcar Children.) I recognize now that animals are a LOT of work. While I enjoy riding horses when I get the chance, I have no desire to own one or care for it. I raise children instead of dogs, and frankly I’ve discovered that I’m not really a pet person. I would still love to go star-gazing more often, but I’m not sure that the farm life is for me. I love the suburbs and our trick-or-treating friendly neighborhood. The floor plans I drew as a child would likely not pass any building codes and had no interesting (and very little functional) architecture. My taste in furniture and desire for race-car and princess toddler beds has definitely changed as well.

Adult Aspirations
When I was in college, I majored in Marriage, Family, and Human Development. I took courses on infant, social, cognitive, and language development, as well as parenting, marriage enhancement, and family finance. For several of these courses, I compiled binders full of parenting articles and created plans for how I would raise my children—what I would teach them, how I would train them, and how I would make them behave.
Walking at graduation, 8 months pregnant with my first.

Then I became a mother.
My first born, K, 30 May 2005

Reality is so different than fantasy, isn’t it?

Adjusting to Reality
These fantasies never came true, and that’s okay. Creating fantasies and dreams helps us to find something to work towards. 
"Shoot for the moon. Even if you miss it you will land among the stars." - Les Brown
However, if we are forever dreaming and planning our fantasies, we can miss out on beautiful things from the present. There is a wonderful post at ZenHabits about Savoring Life. It can be difficult to savor life when we are constantly reminded of all the things we are not doing that we believe we should be. When our lives are cluttered with unfinished projects (or un-started ones), and items that our "fantasy self" would use... but our "reality self" just won't, we cause ourselves unnecessary stress.

If you truly want to become a master baker... start learning now. Make time for it. Put other things away and purge in other areas so that you can be free to bake as often as you can. Personally, my fantasy self would make homemade bread several times a week... my reality self is not good at baking, doesn't enjoy it at all, and would rather sew a quilt... so I guess I can pass on my pastry flour to someone who would enjoy it. :) Maybe then I can quit fantasizing about homemade bread, and enjoy my quilting with less guilt about not being the perfect homesteading wife. :)
Quilt squares that ended up in the quilts on my girls' beds.
My mother also sews, and when my siblings and I were growing up, she made our Halloween costumes most years. She always made high-quality garments and the costumes are still in great condition 20+ years later. I always thought that was awesome, and wanted to do the same for my children. One year, when I had
three children, I made themed costumes for my children, my husband and myself.
Pooh and Tigger - 2008
They turned out perfect, we got a lot of compliments on them that year, and we have used at least one of those costumes every year since.
Halloween 2009 with Piglet, Kanga, Thing 1, Tigger, a princess, Thing 2, and Eeyore
But, it was a lot of work, and I didn't really enjoy the process, and I've never done it since. In fact, now that we live close to my parents, my kids choose their Halloween costumes from Grandma's collection.
Halloween 2012 with a butterfly, Piglet, a cowgirl, a pirate, Tigger, and a princess.
Even if we didn't have access to Grandma's costumes, at this stage, I would rather buy costumes instead of sewing them myself.

Move On
My fantasy self from my childhood has changed. Even my fantasy self from 3 years ago has changed. And that's okay. It's time to grow up, move on, work on current goals and dreams, and let the old ones go... along with the clutter that goes with them. 

02 February 2013

Experiment Day #2

A few weeks ago I did an experiment where I purposely allowed the house to go to disaster mode, then cleaned it as fast as I could... alone. When I told my mother what I had done, she told me I should re-do the experiment with my kids helping, and see how much time we could save.
The kitchen 4:20pm
Another view of the kitchen 4:21pm
The dining area 4:21pm
Yesterday turned out to be that day. I didn't mean for the house to get totally out of control. We weren't even home for half the day. We started the day rushing off to our homeschool group, and returned around lunch-time. We normally eat lunch at our co-op, but we were late and didn't have time to pack a lunch, so we came home instead. 
The family room 4:21pm
Another view of the family rom 4:21pm
The hallway 4:22pm
After making lunch, I was pretty much ready to crash for the weekend. So, I sat down with my computer and allowed the kids to play. We'd already finished our school-work for the week, and I wasn't really motivated to do anything else yet. Shortly after 4pm one of my boys complained that there was "too much pee" in the toilet. I went into the kids bathroom and discovered that the other twin had stuffed about half a roll of toilet paper down the toilet, and there was a flood slowly creeping towards the hallway. I quickly threw a couple towels down to dam the flow of water, and plunged the toilet. This is when I noticed that the laundry basket was totally overflowing as well. 
The bathroom - still with a puddle on the floor, but contained for now 4:22pm 
The girls' room 4:22pm
They had been building tents in their room 4:23pm 
The boys' room 4:23pm
As I looked around the house and realized we were back in disaster mode, I decided now was a good time to try to recover WITH the kids. 
The gathering 4:24pm
I rang our "dinner bell" to let the kids know it was time to gather, and I sat them all down on the fireplace hearth to explain the situation. Then I gave them each an assignment. Most of these assignments were their normal chores for the week anyway. Then I went around taking pictures and helping with the assignments in the normal order I do for the house pickup. 

1. Move Laundry
K moving laundry 4:28pm
K (age 7) had already emptied the dryer earlier, but the washer was still running when she did it. So now she moved the load from the washer to the dryer, then started another load of kids clothes (and emptied the overflowing basket from the bathroom!).

2. Clear Kitchen Table & Counters
C (age 5) started clearing table & counters while I moved on to help D.

3. Wash Dishes
D unloading the dishwasher 4:29pm
The dishes had been run earlier in the day, but never unloaded, and now the sink had more in it. So D (age 6) an I unloaded together while the others worked. 

J2 & M working on the clean-up pile 4:32pm
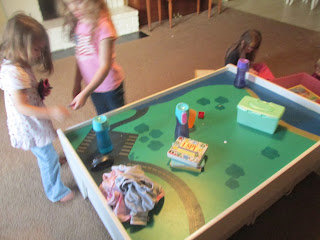
Also during this time I had assigned the J1 & J2 (age 3 1/2) to work on the "clean-up pile" which involved throwing everything they could find onto the train table. M (age 16 months) tried to help with this too. When K finished moving laundry, I sent her to help the boys with the clean-up pile, since they were already getting distracted.

4. Wipe down Kitchen Sink, Table, Counters & Stove
C wiping off the table 4:32pm
By this time, C had finished clearing off the table & counters and and moved on to wiping things down. 
C moving chairs 4:39pm
When she finished wiping the table & counters, C moved the chairs out of the kitchen so I could sweep. Then she went to start folding blankets in the girls' room. 
D loading the dishwasher 4:40pm
By now D and I had finished putting the clean dishes away, and started loading the dishwasher again. It wasn't full enough to run, so we just finished wiping down the kitchen and moved on. 

5. Sweep Floor
J1 working on the clean-up pile 4:40pm
When D and I finished dishes, I assigned her to start assembling the chunky puzzles so they would fit back into the toy bin, and I swept the kitchen floor. 

Mid-Clean-Up Status
When I finished sweeping the kitchen, I went around the rest of the house to inspect the progress so far. Time elapsed since "the gathering" - 22 minutes. (For reference, the last time I did this it took me 31 minutes to get to this point on my own... and the kids have already been working ahead on the clean-up & put away.)
K had already put away all the stuffed animals 4:46pm
C was folding blankets 4:46pm 
I asked J1 & J2 to put the chairs back into the kitchen 4:46pm 
D was busy putting the puzzles together 4:46pm
6. Straighten & Wipe Bathrooms
A clean bathroom again 4:55pm
Now it was time for me to get back to the bathroom. Straightening didn't take too long, and K had already emptied the laundry basket, so I had a perfect place to put all the wet towels I ended up with after mopping up the flood and wiping the floor. 

7. Empty Garbages
I didn't get any pictures of it, but D took out the kids' bathroom garbage for me, and J1 got a new bag for it.

8. Clean-up Pile
Boys' room picked up 4:59pm
Girls' room picked up - two of the girls wet their beds the night before, and their sheets were just moved to the dryer 5:00pm 
The rest of the girls' room picked up 5:00pm
With my help, the rest of the clean-up piles went very quickly and we got everything else to the train table. 

9. Put Away Stray Items
Putting away things from the train table, the puzzle bin is almost full of completed puzzles! 5:00pm
Down to the last few piles 5:04pm
K and I quickly sorted the remaining items on the train table and K, C, J1, & J2 quickly grabbed piles of stuff and put them away.

10. Vacuum
When we finished the stuff, I grabbed the vacuum from the garage and vacuumed the bedrooms, hallway and family room. K moved the cord for me midway through so I could actually get the one corner of the family room I can't reach when plugged into the bathroom outlet. 
Freshly vacuumed family room 5:15pm 
More of the family room, and the hallway, all freshly vacuumed 5:15pm
11. Fold Laundry
Again, I was burned out by this time, and since I didn't fold laundry during the last disaster clean-up, I decided not to this time either. All the clean laundry is piled on the toddler bed in my bedroom, out of the way.

Total time elapsed since "the gathering" - 51 minutes. 
Compared to doing the clean-up on my own - 1 hour 21 minutes.

Verdict - I saved 30 minutes by working WITH the kids... even though I spent a lot of time trying to keep them on task, and several still got very distracted.

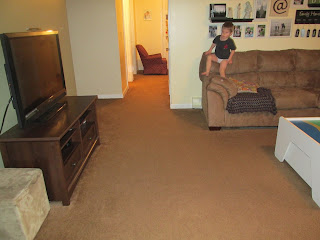
Still, less than an hour after "the gathering" the kids were free to play in a clean house. They decided to practice some gymnastics moves. :)

Playing in a clean house is fun!