Showing posts with label Organizing. Show all posts

08 February 2013

Challenge #3 - Kitchen Cabinets Part 2

As promised, here's the upper cabinets in the kitchen!
Before 
After
This first cabinet is above the plates/bowls/cups, and to the left of the sink. This is where I keep my casserole type dishes, my measuring cups, and where I moved the salad spinner. In the before picture you can see the extra white baskets that I moved to the utensil drawer, and several measuring cups I dejunked. I was doing pretty well with measuring cups, but I started to notice that a 4-cup measuring cup would come in really handy since I was starting to make larger and larger batches of everything. My husband got me a great 4-cup measuring cup for Christmas, as well as a 2-cup. So... I didn't need the old 2-cup, and I realized I really didn't need the 1-cup either, or the smaller set of measuring cups. I already use smaller measuring cups as the scoops in my flour & sugars, so if I really desperately needed a 1/4 cup ONLY for something, I could pull it out of that.

These are also all of my casserole dishes. I have one 9x13, one smaller oval that I think is about 7x9, and inside the oval one are two shallow serving dishes that nest in each other. On the top shelf I also have another 9x7 pyrex, and two 6x7 pyrexes, nested together, and two round pyrex bowls, one smaller without a lid.

We also have the remaining baby food in this cabinet. For a while we had a lot of baby food here, which is why our salad spinner was stored below... but our toddler is eating more table-food now, and we're not buying the baby food anymore.

Before 
After
To the right of the sink is our "catch-all" cabinet. It was kind of being overrun by random things we didn't know what else to do with. But now it's a bit better. The top shelf holds extra dry-goods that don't fit in the cabinet I'll show next. The middle shelf has our supplements, as well as straws and plastic utensils. I wanted to fit the straws & utensils on the bottom shelf, but they were too tall. the bottom shelf has ziploc bags in three sizes, as well as napkins, paper lunch sacks and coffee filters, which we often use for holding goldfish or other finger foods for snack time. (We don't drink coffee... so we don't use them for their intended purpose anyway.)
Before 
After
On the other side of the kitchen, to the left of the microwave is our dry-goods cabinet. This was also starting to get stuffed with random extras, including some raw nuts that were starting to go rancid (oops!). We straightened this cabinet, and even changed what some of the bins were holding and made room in a large one for some homemade pancake mix, which my 7 year old helped me mix.
Before
After
Above the microwave is another cabinet, that is too high for me to reach without a step. I laughed when I opened the cabinet for the before picture, because almost everything was missing from it. This cabinet normally holds the only two vases I own (one large plastic, and one small glass bud vase), a round bowl meant for centerpieces, and three pitchers. Even in the after picture, one of the pitchers was being used, so it wasn't put away.
Before 
After
And to the right of the microwave is the spice cabinet. As I was cleaning out the "catch-all" cabinet, I found 12 small empty spice jars that I had purchased a while ago from the bulk foods section of our grocery store... planning to transfer spices from much larger containers to save space... but then I never got around to actually doing it... until this project! I was able to downsize several spices that didn't even fill the new smaller jars, and a couple huge spice containers were able to be moved to the garage pantry shelves after filling a smaller jar. There is so much more room in this cabinet now, and the spice carousel actually spins freely without things falling off the back. :) I also had so much room that I was able to put the spices only on the outside of each level, and put other things in the middle. The top level only has extra toothpicks in the middle (we ended up with several extra small boxes of toothpicks after my husband helped with a cub scout activity), and the bottom shelf has cupcake wrappers and sprinkles in the middle.

I did keep a couple of the larger containers on the lower shelf for a couple reasons: We use things like the taco seasoning WAY too frequently to be refilling the tiny containers, and I ran out of smaller jars. :)

My recipe book is on the top shelf, along with one cookbook. I have a few more cookbooks in the garage, but I rarely reference them, and with limited space, they just didn't make the cut to the kitchen cabinets. :) The black recipe binder has most of the recipes that I use frequently, and we do a lot of normal dinner cooking without recipes at all... just winging it. If we do need a recipe for something, it is more likely that I will find something online, and won't even think to check the books I already have.
Before 
After
Finally, the cabinet above the fridge. I ended up donating the magnetic letters which I haven't been willing to use for the past 3+ years, as well as a Christmas tin that I'm not sure why I held onto in the first place. The round pyrex bowl with lid was moved to the first cabinet I showed above. The rest includes a box with a set of designer stem glasses that were a wedding present from my parents (his & hers Mickey & Minnie glasses that we use for very special occasions), and a set of 5 glasses (used to be 6) that were also a wedding present and have a frog icon stamped into the glass, and three mugs that I use for hot chocolate. I rearranged these so that I could also fit a bag of corn chips in the cabinet. We usually just toss the bag on top of the fridge, but the kids like to climb up there and make a mess with the chips when they know they're there... out of sight, out of mind, right?

Also, on top of the fridge you can see the broken panel from the utensil drawer, that I still need to fix.

And that concludes the kitchen! I still need to organize & straighten the pantry shelves in the garage a bit more, and that is an ever evolving process as we continue to add more to our food storage, and try to move things out of the kitchen.

For those that were wondering, my crockpot doesn't fit in any of the kitchen cabinets, and I don't use it nearly as often as I should... so it is usually stored on a shelf in the garage.

06 February 2013

Challenge #3 - Kitchen Cabinets Part 1

Okay, so this challenge took me a bit longer than I intended, and a bit longer to write up than I anticipated... so I'm a bit late... but you forgive me, right?

Thanks. :)

To start... I have a small kitchen. I've had smaller, but usually with more cupboard space... at least this time I have a garage.

I've shown pictures of the kitchen before, but here's a refresher:
The sink side of the kitchen and the dining area.
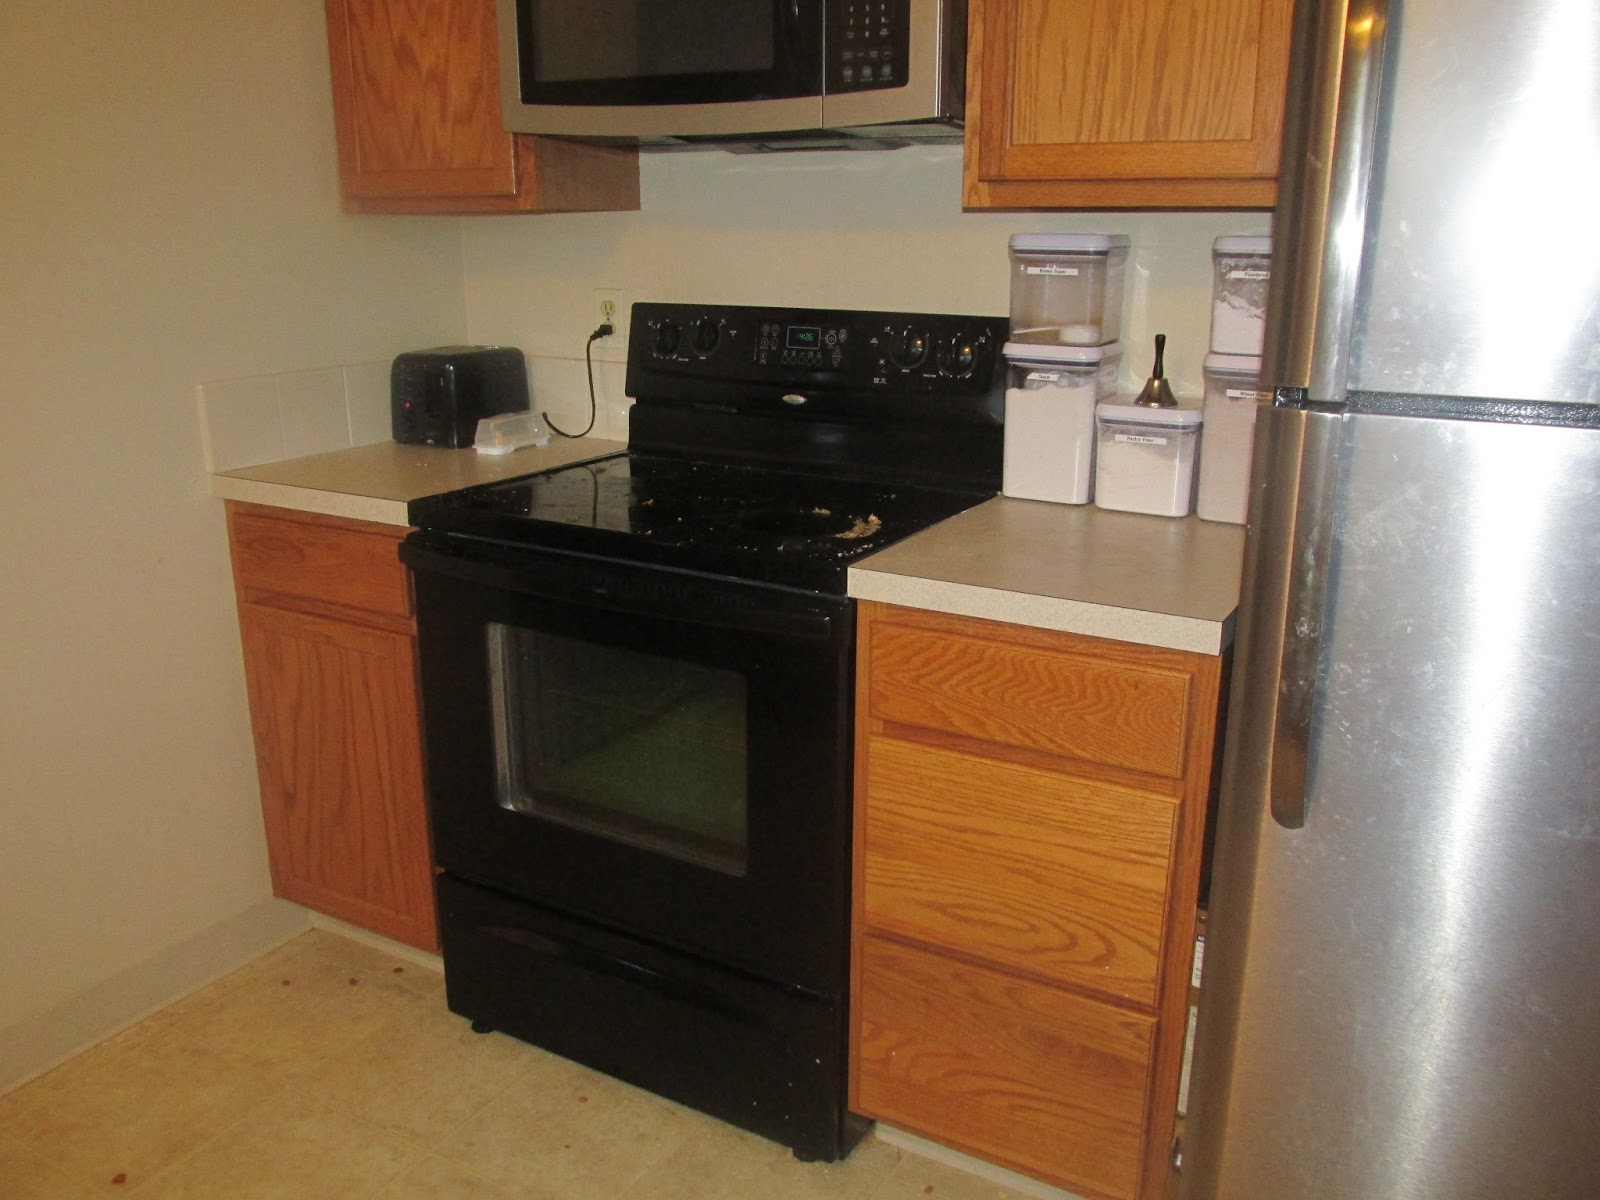
The stove & fridge side of the kitchen. There is a cabinet above the microwave, and above the fridge.
In the spirit of full disclosure... my kitchen does not look this good right now. I haven't finished moving some of the decluttered items to the garage yet, and the counters are currently more cluttered than the cabinets... it happens. But this is approximately what it will look like again when I finish. Except that the crock-pot does not belong on the counter at all... but it is still there for now.

I think we'll start with the lower cabinets on this post. That includes most of the cookware and dishes. This first cabinet is the lower one closest to the kitchen table. This is where we store all our plates, bowls, cups and leftover containers, and most of our mixing bowls. Basically... it's the plastic cupboard. Everything is plastic because we have 6 very small children, and we store these low so the kids can help set the table and unload the dishwasher easier.
Before 
After
This cabinet didn't need too much work. I decided to donate the wooden lazy susan. We haven't used it in over two years, because it doesn't fit on our table, and now our kids have learned to help each other pass things around the table, so we don't need it as much. The salad spinner moved to a different cabinet. We still have the leftover containers on the top shelf (and several of them were being used when I took this pic), and the back corner still has four mixing bowls that nest pretty well, as well as our red plastic colander that we use for pasta & such.

Above the plates & cups is the utensil drawer. We've had problems with this drawer breaking ever since we moved in... so I need to fix it. When I took the before picture, we had just pulled everything out of the drawer and set it on the counter.
Before 
After
We decided to get rid of our old silverware and only keep one set. We had talked about doing this for a while, and just never got around to it. I just discovered last week that our local women's shelter was asking for silverware donations, so now seemed like the perfect time. The newly dejunked drawer now holds a basket of corn on the cob skewers, a basket of chip clips, the utensil caddy which holds 8 large spoons, 16 small spoons (that's what came with the set!), 8 large forks, 8 small forks, and 8 serrated knifes that don't belong with the set, but that we use for steaks & things. The other baskets hold my measuring spoons, the 8 dinner knives that came with the silverware set, two serving spoons (one slotted) and the ice cream scoop, my cheese knife and the vegetable peeler.

The next cabinet over is the large one under the sink. I totally forgot to take an after picture of this one, but here's the before. I didn't do much in here, and didn't get rid of anything... just straightened it. Here's where we keep extra garbage bags, dish soap, dishwasher detergent, foil, saran wrap, wax paper, freezer paper, and my cooktop cleaner.

Next to the under-sink cabinet is the dishwasher, then one more narrow cabinet between the dishwasher and the wall.
Before
After
This cabinet actually made me laugh. I took the before picture, then I pulled everything out to figure out what to dejunk, and realized I really had already cut back to my minimums... so the after picture looks nearly identical. I decided to pull everything out again and lay it out so you could more easily see what I have kept.
I have: one light baking sheet, two dark baking sheets (identical and stacked together), one mini-muffin pan, one ancient cupcake pan, one wire cooling rack, three cutting boards, and across the top, two pie tins and three loaf pans. You can probably tell from this how much I actually bake. :) The only other thing in the cabinet is the wire rack for my round baking stone, which for some reason doesn't fit in this cabinet.

Above this cabinet is a small drawer.
For some reason, I forgot to take an after picture of this drawer too. Here's where we keep all the baby bibs, and the extra sponges & kitchen rags.

That concludes the sink side of the lower cabinets.

On the stove/fridge side the first cabinet between the wall and the stove has a drawer above it too.
Here's the before picture... pretty sad. This drawer is supposed to hold the hot pads and the kitchen towels. Unfortunately, the kitchen towels are in the clean laundry pile that I am procrastinating getting to... so the drawer is currently empty. There was no point in taking an after picture. :)
Before 
Midway through.
This cabinet below the towel drawer took a bit longer, because it also ended up including extra things from elsewhere in the kitchen. Midway through you can see the round baking stone on the far left, the air-popper and popping corn at the back, and the blender in front.
This is a pile of stuff that I dejunked just from this one cabinet. The food chopper we just didn't use. The popcorn buckets we didn't end up liking (they held too much popcorn, spilled too easy, and were not easy for little hands to get popcorn out of). The KitchenAid attachment didn't come in as handy as I'd hoped. The tiny waffle iron has been replaced with a bigger, and more functional one, and the black plastic cover thing is for a cheese grater that we already got rid of because it broke.
Before 
After
Up next is the drawer to the right of the stove. This is our spatula drawer. I mentioned this drawer in a previous post, showing that it doesn't have to be perfectly organized. Unfortunately, the drawer was starting to break the 80% rule, and it was time to be purged. Most of the gadgets in this drawer are still used, but not on a regular basis. Anything that wouldn't be used at least once a month I moved to a plastic bin.
Then the plastic bin was put on the shelf of the previous cabinet.
After
The other things I put back into this cabinet are my rolling pin, and my KitchenAid mixer (the bowl for it was in the dishwasher at the time).
Before
After
Two more drawers to go! Under the spatula drawer we have two deeper drawers that I use to store my pots & sauce-pans. I decided to move the aprons out of this drawer, because they were just making things difficult. I had two spoon-rests on the bottom of the drawer and I asked my husband if we really needed them, since we hadn't used them in a while. He told me he had been looking for one because he wanted to use one, but hadn't known where it was... HA. My bad. So, we chose one spoon-rest, and donated the other. Now the drawer is uncluttered enough that he can find the spoon-rest. I also have a wok and a large pot, each with a lid, and a strainer.
This last drawer didn't need any decluttering or reorganizing. It has looked pretty much the same since we moved in a year and a half ago. I have two sauce pans, one deep, the other shallow. The shallow one also has the steamer in it, and a lid, the deep one has a lid along with a tinier sauce pan, with it's own lid. These pans only fit in this drawer in one way, and it's the only place in the kitchen I have to store them, so we just make sure they get put away where they belong every time.
I almost forgot the last space in the lower half of the kitchen. This is the drawer under the stove. It also didn't really have a before & after because I didn't have anything to get rid of from here. I have three frying pans, a red silicon vented pan cover (because my medium sized frying pan doesn't have a lid that fits it), and my waffle iron/griddle/sandwich maker.

Tomorrow I'll cover the upper cabinets!

31 January 2013

The Garage: A Work in Progress

We have to store the "clutter" somewhere, right? In our home, all the "stuff" that we don't use enough to keep in the house, is stored in the garage. As the title of this post suggests, this is a work in progress, and it always will be. We are continually purging our storage, and adding to it, and rotating through, and cleaning out, and reorganizing. Some days/weeks/months it looks better than others. Right now it actually looks pretty good, but that just makes it easier for me to "see" the projects I have ahead of me. :)

So, here's the tour of the most cluttered space in our house:
The view of our garage from the driveway. Obviously, our van insisted on nosing his way into the picture.
The other side of the garage. Again, the van wanted to be included.
I've mentioned our garage laundry area before, but here's a more zoomed out picture of it. On the floor in front of the machines is our laundry bucket that collects dirty socks and kitchen towels, as well as a diaper bag full of cloth diapers that need to be washed. On top of the washer is the detergent dispenser, as well as several grocery bags full of toys that were confiscated because the kids refused to pick them up, and now they have to earn them back. The dryer currently holds a stack of empty boxes because I haven't figured out where else to put them yet.

Next to the dryer is a water heater and on the floor in front of that is a tiny garbage can for dryer lint, a box of baby wipes and two boxes of disposable diapers (Costco coupons). Behind the diapers is an extra kitchen chair that currently holds a bag of potatoes and a bag of grapefruit. You can also see the step to the house, and through the open door you can glimpse our dining table and part of my fridge.
On the other side of the door to the dining area is the "mud room" shelving unit that holds adult coats & shoes. Above my shoes is another shelf that holds toys that don't fit into toy bins. I took this picture on Monday before we moved the waffle blocks to the house for this week's toy rotation. On the very top of that shelving unit is a stack of empty boxes that also contain original foam packaging for various items in our home, like my sewing machine and KitchenAid mixer. We've moved a lot in the past 10 years, and I have insisted on keeping several of these boxes.

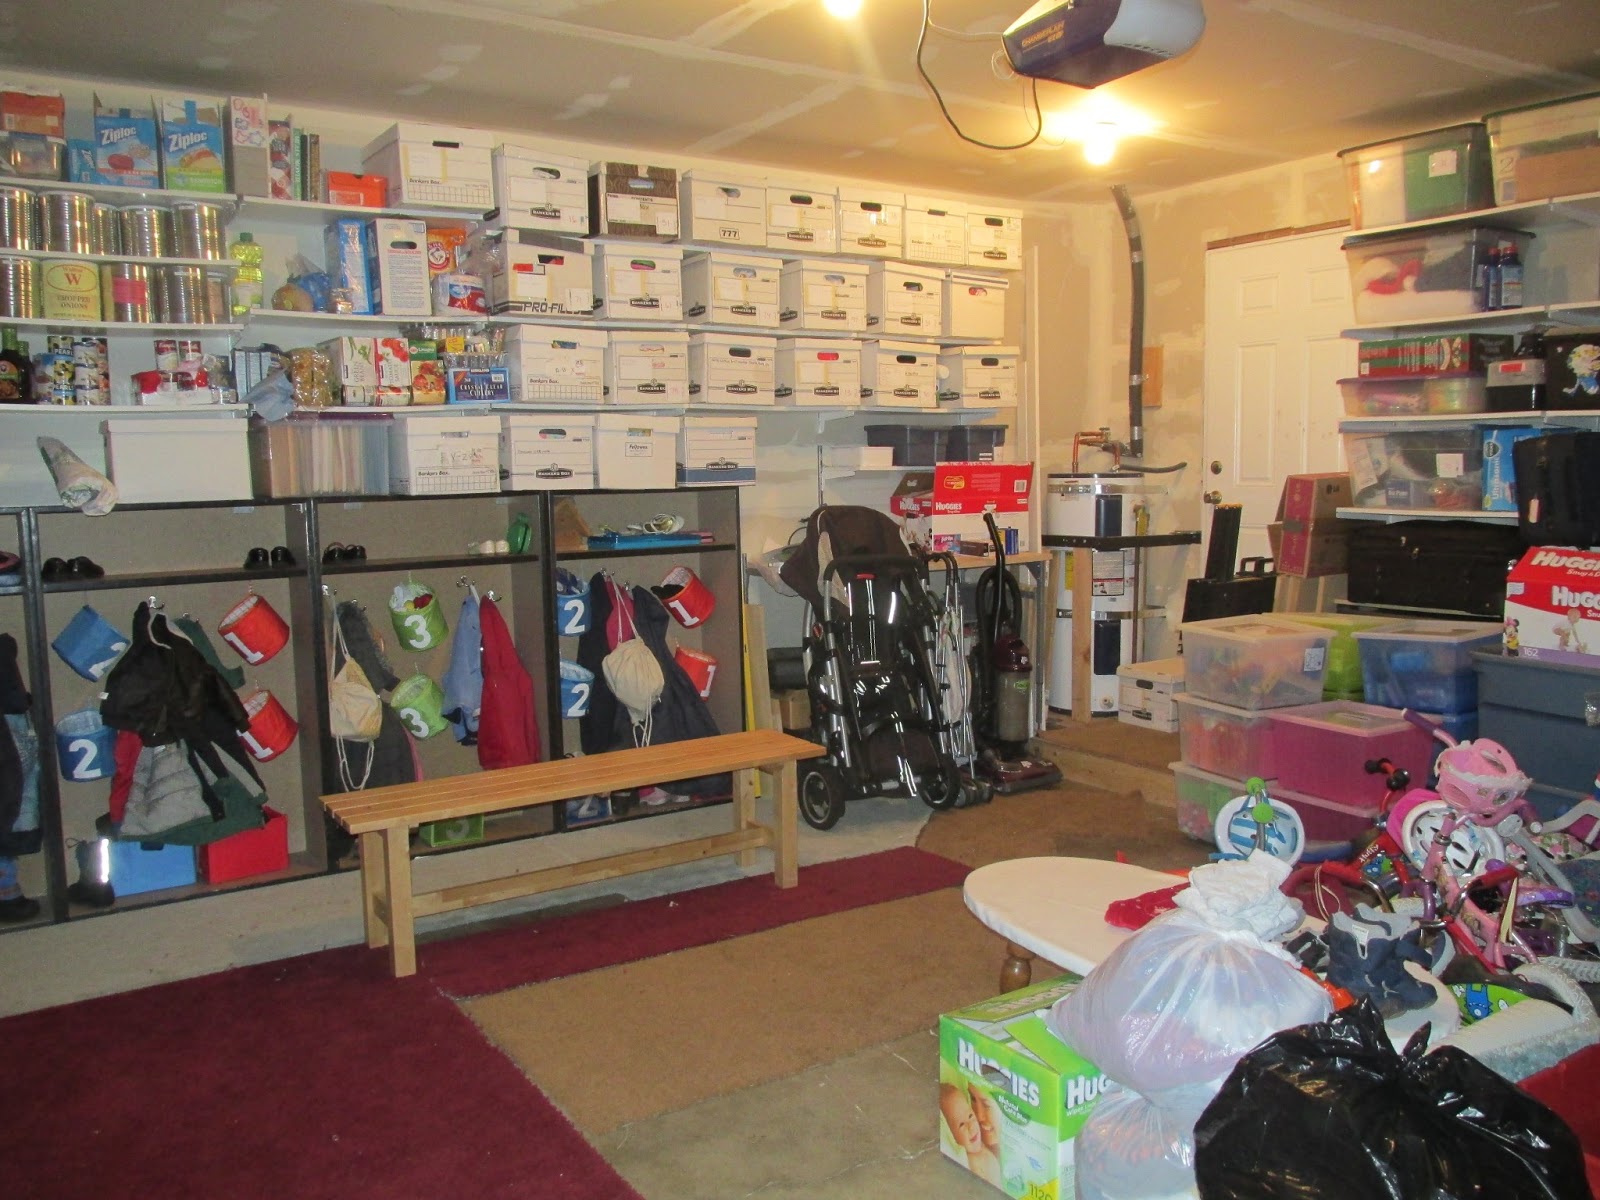
The back wall of the garage holds the kids' coat/shoe/mud room area. The shelving above on the left is our pantry. It's more sparse than we would like at the moment, but it's functional. Canned goods and other dry goods live here. We plan to expand this farther to the right as we build up our food storage. On the right are storage boxes.
Here's a better view of the storage boxes. Four of those boxes are sewing supplies that I put back after my craft/sewing purge, at least 10 of them are homeschooling materials that I needed out of my way, and plan to seriously purge soon, and 5 of them are empty. I also have a couple boxes that hold off-season mud room items, like swim floats (since it's winter), and soccer cleats/shin guards/socks. I think there might also be one box of baby girl items, that I moved out of the house after we discovered that our anticipated addition is another boy. As we purge more of these boxes, we'll have more room for our pantry.

Under the shelves, and to the right of the mud room area is our workbench, which is currently hidden behind our giant double stroller, two umbrella strollers, and our large vacuum. The back corner of the garage has an additional water heater that is only connected to the master bathroom (probably my favorite feature in this house!).
Our back door is currently blocked by a couple saw horses that need to be returned to my parents, some wood for a current project, and a couple more empty boxes. The shelves along the far side of the garage hold more "long-term" storage, including Christmas decor, other holiday items (like Easter baskets & plastic eggs & trick-or-treating baskets), dead files (paperwork I can't get rid of for various reasons, but that I don't need to access), luggage, etc. On the floor in front of several large totes are the toy bins that are not in use this week (and a couple empty pink ones that just got dumped into the train table drawers). The totes behind and to the right of the toy bins hold things like extra winter coats & snow pants (we don't live in a climate where we need access to snow gear, but we visit family that does live in snow). There's also a tote of "sports equipment" that we are not currently accessing because it's too rainy, and there's a tote of home decor items that don't fit in our current home, but have sentimental value and I can't bring myself to get rid of them (see, I'm not completely heartless...).
The middle of the garage seems to be the catch-all. Right in the middle of the garage is a short coffee table with a white vinyl cover on it. This was meant to be the kids' art table, but it lost its place in our family room when we rearranged things not too long ago, so it's in the garage. It has actually been used for painting, while in the garage, so it's still functional. Currently, it's holding several items that I am passing on to my sisters and need to ship to them. On the floor to the right of the table are a couple boxes and bags that are donations I haven't dropped off yet. You might recognize some of those bags and boxes from my craft supply purge. There's also a red recycling bin behind the black bag that holds glass recycling.

Behind the table is a large jumble of bicycles and tricycles. Someday we will be purchasing some type of bike rack to keep these from falling on top of each other... but this is also part of having a large family... 2 adult bikes, 3 children's bikes, 2 tricycles and a scooter just take up a lot of space. :) If you look close (I-spy...) you can see an extra high-chair, and a bumbo seat. I've considered passing on the high-chair, but we've used it for guest's children, and occasionally for our 3 year olds when we have people over for dinner. I'm also pretty sure we'll use two again when our newest baby can sit up, and before our toddler outgrows hers.

To the far right in this picture are the large recycling bin and the smaller garbage can. We like to keep these in the garage so we don't have to go outside to empty indoor garbages, and so they don't get full of water when it rains, but also close to the garage door so we can drag them to the curb easier.

Also hanging on the far wall close to the garage door are two sets of golf clubs, and a large hiking backpack that is an emergency pack. Admittedly, it's a very old 72 hour kit, that was meant for 2 people and would probably last our family about 8 hours. :) Time to update.
Here's a better view from behind the garbage cans. Next to the adult bikes is the lawn mower and a collection of yard tools. On the floor under the fan and exercise ball are several wooden drawers that hold other yard equipment, but can really only be accessed when the lawn mower is pulled out.

As I said, this garage is a work in progress. It has changed a LOT in the year and a half we have lived here, and it is slowly morphing into what we want... but it will still take a lot of work. I will say that having a semi-organized storage space has made seasonal and holiday transitions much easier because we can find what we need fairly easily, and get it put away pretty quick.

And I just noticed how full our garbage can is in that last picture... that's because it's garbage night and we haven't squished the bags down yet... we usually fill the can, but rarely, if ever, overflow. :)

30 January 2013

Our Mud Room: What Works for Us

I've always wanted a mud room. I actually had something closely resembling a laundry/mud room in one home we rented once. But we only lived there for 8 months, and only had three children back then.

The more children we have, the more I have found a need for a mud room type space to store things like coats, shoes, boots, mittens, backpacks, diaper bags, etc. Our current home has nothing resembling a mud room, and our laundry is in the garage, so no laundry room either. But we have improvised.

We have been blessed with a two-car garage, that is too small to fit either of our vehicles. The home was originally built with a very long garage, but the back half of the garage was converted into our master suite by previous owners. Our large van is too tall to even fit in the door, and even our mini-van is too long for the shortened garage.

So, since our garage is unusable to park in, we have used it to create a make-shift mud-room.
We started with shelving units that came with the house, and laid carpet scraps down to create a cozy, and semi clean floor. The bench used to be in our dining area, and we still may use it there again someday, but it's not needed now, so it functions better in the mud-room.
On the far left of this photo you can see the door into the dining area, my long winter coat hanging from the side of the shelving unit, and then the area for my husband's and my coats. There are six hooks (the same kind holding the kids' towels in their bathroom) that we use to hang our coats, jackets & sweaters. My husband lines most of his shoes up on the bottom shelf, and my shoes are lined up on the upper shelf.

On the right, you can see the spaces for our two youngest. Each child has two double hooks and three baskets in their section, plus shelf space above. In the winter, the hooks hold jackets, backpacks and snow coats. In the summer, they hold swim floats, sweaters, and backpacks.
We have the kids lined up in age order, with the youngest closest to my husband and me. The older ones don't need help getting their shoes on, so we put them farther away.
Here is our oldest daughter's section. She has a sweater, a jacket, a coat, and her backpack hung on the hooks. Her snow boots are on the bottom shelf under her hooks (and her sister's boots are also in her space...it happens). Her tennis shoes are in the red basket on the bottom shelf. In the bottom left corner you can see our second daughter's tennis shoes in her blue basket.
The kids also each have two hanging baskets. The lower basket for each of them contains socks. I've mentioned before that we tend to go barefoot in the house. My kids much prefer to be barefoot, and if they attempt to wear socks in the house, we end up with them under beds, stuffed into the couch, etc. The kids don't put socks on until they are putting shoes on to go outside, so it makes sense to store the socks with the shoes. This is also why we have a laundry bucket in the garage to collect dirty socks as they take them off when they take their shoes off to come in.

The upper basket holds seasonal or personal items. Currently my oldest has her winter gloves in the basket. I think she also has a wallet with her money in this basket too. In summer this basket holds swim goggles and in the fall it holds her shin guards and soccer socks.
The shelf space above is used for Sunday shoes and other personal items that don't fit so well in the upper basket. We have found that it is best to keep the Sunday shoes out of the way so they are not worn and lost, and so we can all easily find them when we are leaving for church. When we get home from church, or another fancy event, we make sure everyone's dress shoes are put back on the shelf, and the kids are not allowed to wear them at any other time.

Ideally, I would love to have fancy, built-in locker type spaces for each of my kids. And with doors to hide the clutter...but we do the best with what we have. As I mentioned above, these shelving units came with our house, I bought the hooks cheap at Target, and the baskets were pretty cheap at Ikea. Also, since our kids are pretty short, we can't do taller, skinnier spaces yet, so this takes up a lot of horizontal space.

While this mud room space is less than my dream space, it has functioned beautifully and mostly unchanged since we move in to our current home a year and a half ago. If it works, don't change it. :)

Tomorrow I'll share the rest of our garage.

29 January 2013

Accommodating Individuality: What Hasn't Worked for Us

We currently have 8 individuals living in our house (soon to be 9). Each of these people has their own personality, their own desires, their own likes and dislikes. We also live in a very small home, averaging approximately 165 sq ft per person.

I've had a lot of questions recently about how we accommodate individuality in our home. What we do with "personal" items, or special trinkets for each person, and how we handle individual preferences. With such limited space, we have several general rules to help everyone live comfortably, and then we have tried to create personal space for everyone. We have not always been successful in finding solutions that work for everyone, though, so I thought I'd share several of the things that didn't work for us. Maybe they'll work for you, or maybe they'll help you find something that does work for you.

House Rules
The first rule in our house is that it is our house... Mine and my husband's. The house does not belong to the kids. They did not pay for it, they are not financially responsible for it, and they do not have rights to the house (this rule was the same in all rentals we lived in prior to purchasing our home). Our children are given stewardship over their bedrooms, but the rooms and the space still belong to Mom and Dad.

The second rule is that if you can't take care of it, you don't get it. If the kids cannot maintain an acceptable level of order and cleanliness in their room, they lose the privilege of keeping certain items there. This is one reason that our children's rooms are so barren right now. In the past, we have allowed our girls to keep a few special items in their room... but they were rarely put away where they belonged, and that privilege was lost. We have also had crayon, pen, pencil, and marker drawn on the walls and dresser, so art supplies are not allowed in the bedrooms anymore.

Communal Property
Most of the toys & supplies in our home are considered communal property. No one "owns" any of the hair accessories, they are simply available on a first come-first served basis. The Duplos and blocks are meant to be shared, or for taking turns, even though a couple Duplo sets were specifically given to the boys as Christmas presents.

When our children receive gifts of toys, they are usually allowed to play with them on their own for a period of time, then they are put with the rest of the toys of that type and are considered "share-able." There are still some toys and items that seem to retain an owner, even though they are shared toys. Everyone seems to know that the small stuffed hippo belongs to J2, and the lioness belongs to J1. The zebra is K's, and everyone knows it's name too... but the zebra, the lioness, and the hippo still end up in the large toy box with the other stuffed animals every day.

*Special note: growing up our toys always ended up as communal as well, which wasn't a big deal. But now that most of my siblings are grown, my mother wishes she had at least labeled toys with who had received them as gifts and things so that it would be easier to divide up the toys as she passes them on. We are working on labeling a lot of our toys in this way... similar to Andy from Toy Story. :)

Projects & Special Toys
Every child has toys and items they are especially possesive of: the special doll they have slept with since they were a baby, their favorite drawing of a rainbow, random craft projects from when Grandma visited, even the picture of their favorite pizza from the weekly mailer.

I understand the need to keep these special items in a special place, and away from the communal toys & projects, so we have tried a couple methods for helping our children keep their private things, but also keep them from taking over our house.

Gallery Wall
One method we tried with varying success was a "gallery wall" in the girls' room. In a previous apartment, we hung a piece of yarn and attached special projects with clothespins. We allowed the girls one clothespin for each year (so, our then 4 year old had 4 clothespins). The girls chose what to keep, and when they wanted a new picture or project hung, they had to choose which one to get rid of from the wall.
This worked for a while, but as they got older the projects got heavier and they got more clothespins. Eventually they decided to use the yarn as a swing and pulled the whole thing off the wall... it didn't go back up after that.

Then, in our new home, we allowed the girls to hang special pictures & drawings on the wall using push pins. This didn't last very long because the push pins would fall out and could be dangerous for little ones.

I liked the clothespin idea before, but needed something sturdier. I installed cup hooks on the girls' bedroom wall, and gave them binder clips to hang from the cup hooks. This was simple enough that the girls could keep up with the art replacement on their own, and sturdy enough to hold most projects, and some 3D items.
Unfortunately, the girls didn't keep things maintained very well. The younger ones ended up ripping the cup hooks right out of the wall so they could use them for a different "project" and we slowly stopped hanging things altogether. In this picture you can see our oldest still had a few things hung, but her sisters hooks below hers are empty and most of them are actually not in the wall anymore.

Cubbies
Another method we have tried to use is one we call "cubbies." We purchased an inexpensive shoe storage solution that has 6 cubby type spaces in it. Each of the girls was assigned two cubbies and allowed to keep whatever they wanted in their cubby as long as it followed two simple rules: 1) you may not keep anything in your cubby that belongs to someone else, 2) everything in your cubby must fit IN your cubby.
This method is still in use now, but we have had some problems with it as well. The first problem is that the girls can't find anything they want from the cubbies, and end up dumping the entire contents to find what they are looking for, and then don't put anything back. Also, the cubbies have been used for play as well as storage, and they have not held up as well as I would have liked.
For these reasons, the girls have lost the privilege of keeping the cubbies in their room. For now, they are kept in the school room, where they only have access to them with permission.

Why These Didn't Work
Honestly, I believe that the main reason these solutions have not worked for us is because our children are simply too young and immature. I firmly believe that if you really care about something, you will take care of it. Our children simply do not care enough about their personal items to properly care for them. But they are learning.

We will continue to offer our children opportunities to care for their own personal belongings, and if they show maturity, they will be allowed to keep more things separate from the communal items. If they do not take care of their personal items, and leave them out of place, refuse to put them away, or allow younger siblings to make a mess with them (like leaving markers on the floor in a bedroom while they are playing with ponies in a different room), they will lose those privileges.

Future Options
While some of the ideas we have tried so far have not worked, we have thought of other options to try in the future, when our children seem to show a bit more responsibility. These ideas are mostly for a defined space for our children to keep their treasures, so that they can have some control over what is in the space, but they are still required to keep things they are not actively using IN the space. Some options for this space include: plastic bins stored under a bed, a locking box stored under a bed or in a closet, a closet drawer or shelf, a nightstand with a drawer.

Someday, if we ever have more space and resources available to us... I would love to provide each of my children with a armoire to customize however they choose, and store whatever they want. (Lots of great ideas here and here or just Googling "repurposed armoires" and scrolling through the images.) But there's no way we could fit that much furniture in our current home, so we'll be working on a smaller scale for now. :)